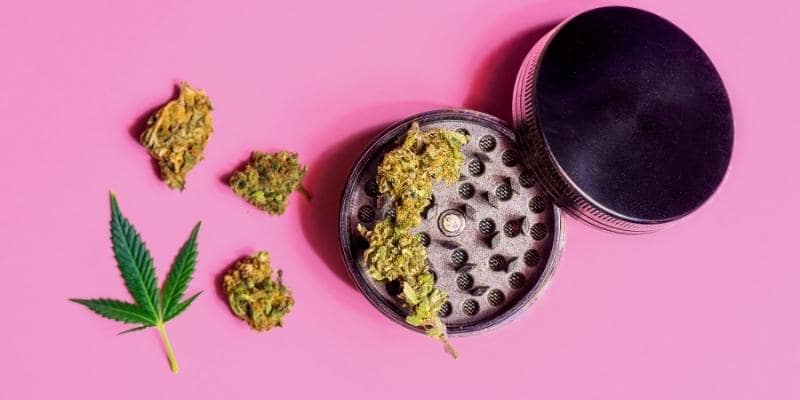
5 Easy Steps On How to Clean a Weed Grinder
In recent three years, cannabis consumption has reached a new “high.” Given the legalization of cannabis in the US, more people are bent towards reaping the advantages of its herbal properties.
Nevertheless, cannabis usage is not new. Instead, people have been conventionally using cannabis since primordial times. Moreover, with the progress in science and technology, people have become more accepting of cannabis.
Thus, the dynamic cannabis industry keeps introducing innovations in consumption methods, products, or devices. Correspondingly, cannabis consumers who prefer smoking the herb are well-acquainted with the need to grind the herb into smokable pieces.
Although you can do it with your hands, most people use a weed grinder before vaping to get the best results. If you belong to the latter category, you have likely been through times when it became slow and eventually failed on you.
No need to fret because it can happen to anyone. Most of the time, the problem behind this issue lies in the cleanliness of your grinding gadget. In this article, you will learn how to clean a weed grinder in a few easy steps.
What Is a Grinder?
A grinder is an essential tool for fast-rolling, rewarding smoke, and they are easily accessible in various options. Unsurprisingly, cannabis smokers give in their best to ensure a smooth smoke session. In correspondence, finely ground herbs are crucial to ensure that things don’t get sticky.
Furthermore, these tools are vital to ensure an even burn while you smoke and maximize the consistency and efficacy of the product.
However, to give the best results, this machine also requires maintenance. If you don’t clean your grinder routinely, it is bound to get gunked up, compromising its efficiency.
Things You’ll Need to Clean the Weed Grinder
Over time, the build-up of resins, powdery kief, and plant residuals make the grinder’s lid sticky, and the blades cannot rotate. Consequently, it is challenging to work with a dirty device as it doesn’t crush the herbs as efficiently.
Therefore, cleaning a grinding device regularly is essential to make things easier and reap the advantages of a weed grinder as if it were new. For the best results, you can use:
- Isopropyl alcohol, i.e., rubbing alcohol (for metal grinders)
- A toothpick
- Ziploc bag
- A freezer (optional)
- Soft-bristled toothbrush
- Container for the kief
5 Quick Steps to Clean Your Weed Grinder
If you’re the grinding device is troubling you, chances are it has a lot of dust and leftover plant matter from your previous grinds. Although the primary purpose of cleaning your weed grinder is to get rid of this material, these leftovers are very potent and have high levels of THC.
Alternatively, if you wish to save the kief, you can take a longer route and harvest the residue for future use.
To thoroughly clean your grinding unit and reinstate its original condition, you need to follow these steps:
Step #1 Disassemble The Parts of Your Weed Grinder
To begin with, you should detach the different parts of your grinder. Depending on the unit you use, it will have several removable parts to allow easier cleaning.
However, be careful while you disassemble your device. Ensure that you don’t exert a lot of force that may lead to breakage rendering it useless.

Step #2 Freeze Your Weed Grinder (Optional)
If you’re willing to harvest the residual compounds from your grinder, this step can maximize the recovery. Arrange the parts of it in an upright position in your freezer, and leave them for 30 minutes.
This is the best way to clean a grinder given that, once you place it in a freezer, the aluminum surface of the device will freeze, and the plant matter will form clumps making them less sticky.
Therefore, these resins will be easier to remove and allow you to save every last bit of the useful cannabinoid-rich material.
Step #3 Pick Out the Plant Residue
After removing your weed grinder from the freezer, sweep out the clumped plant material from its surface using a soft toothbrush.
You can collect this material in any container to store for future use. Don’t forget to collect the plant debris from the edges, crevices, and surrounding the blades. Moreover, you can use a toothpick to clear the circumference of your lid and reach other inaccessible areas.
Step #4 Bathe It in Alcohol
Next, after saving as much plant residue as you can, place all the parts of your grinder into a Ziploc bag. Pour isopropyl alcohol in the bag to fully submerge the pieces of it.
Let your grinding unit sit in the alcohol bath for some time and allow the alcohol to dissolve the cannabinoids. In case there are sticky residues on its surface, carefully give it a little shake allowing the grime to come loose. Allow it to soak until you are satisfied that all the residuals have come loose.
Step #5 Remove, Rinse and Dry
Finally, remove all the pieces from the Ziploc bag when you are sure your weed grinder is free from all the dirt and grime sticking to it. Thoroughly rinse them and remove any remaining residuals in the process. To finish it off, pat your herb grinder dry using clean towels and reassemble all the pieces of it.
Final Thoughts
To enjoy the best results from your weed grinder, you need to ensure its regular maintenance. Following these simple steps to clean a grinder, you can make it as good as new. Also, you can utilize the remaining plant debris and use it in the future.


